Fire TV Recast: My Favorite Features, Tips, and Tricks
Amazon released the Fire TV Recast towards the end of 2018 and it has found its way into many cordcutter’s homes and living rooms. The Recast has some cool built-in features and conveniences that make the user experience more enjoyable. I’ve collected some Recast tips and tricks in this article.

By Shainur Ahsan
Fire TV Features, Tips, and Tricks
After I setup my Fire TV Recast, it has grown on me during my last month of using it. Slowly, I’ve been finding useful features Amazon has included to improve the functionality and user experience of the Fire TV Recast.
There’s still a lot of features I’d love to see Amazon add in the future, but for now here are my favorite features, tips, and tricks for using the Fire TV Recast.
2020 UPDATE: THE FIRE TV CUBE CAN NOW CHANGE TO OTA CHANNELS USING YOUR TV'S BUILT-IN TUNER.
In July 2020, Amazon added functionality to the Fire TV Cube to tune to OTA/antenna channels using your TV’s built-in tuner. Read about how to use setup the new function here.
1. Stream Live TV or Recordings while Away from Home
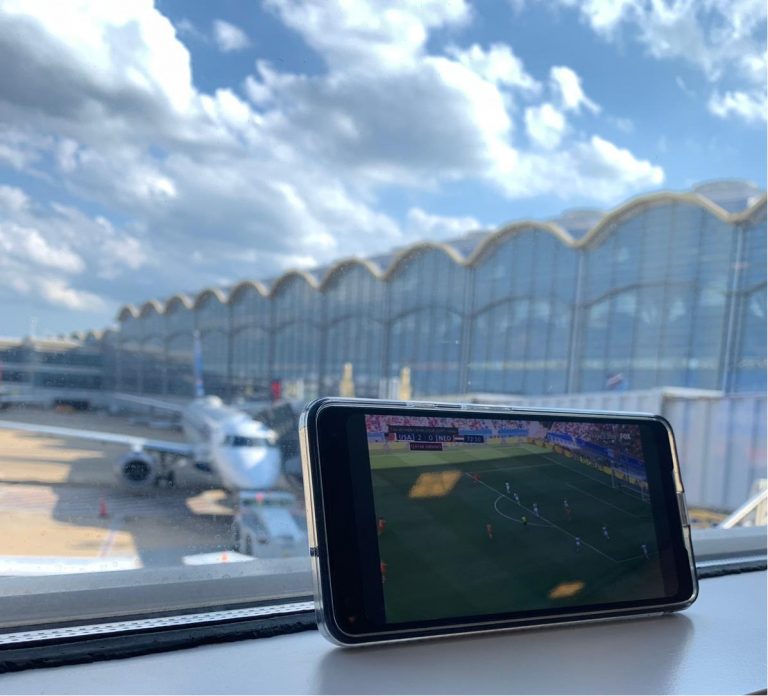
One of the best features of the Recast is being able to stream to your phone or tablet through the Fire TV app. I’ve done this on both WiFi networks outside of my house as well as through the cell network with great results. You can access both live TV as well as your DVR recordings.
This feature is set up by going to the setting on your Fire TV app and selecting Streaming on the Go. You’ll need to enable the option for Streaming Out of Home. Also on this page, you can adjust the quality of the stream to save data. This screen conveniently lists the estimated hourly data usage for each of the four options for streaming quality.
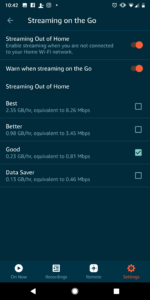
I typically use the second worst option to save on data. The good thing is you adjust this setting from your phone. If you find WiFi, go ahead and use the best quality.ptions for streaming quality.
2. Move Forward by a Day in the Channel Guide
I stumbled upon this useful feature recently as I was endlessly clicking the right button to move forward in time in the channel guide. Instead of doing this, simply use the fast-forward button on a Fire TV remote to advance by one day. This is especially useful when you want to schedule a recording in advance.
3. Watch a Channel while Searching for Something Else to Watch (on TV)
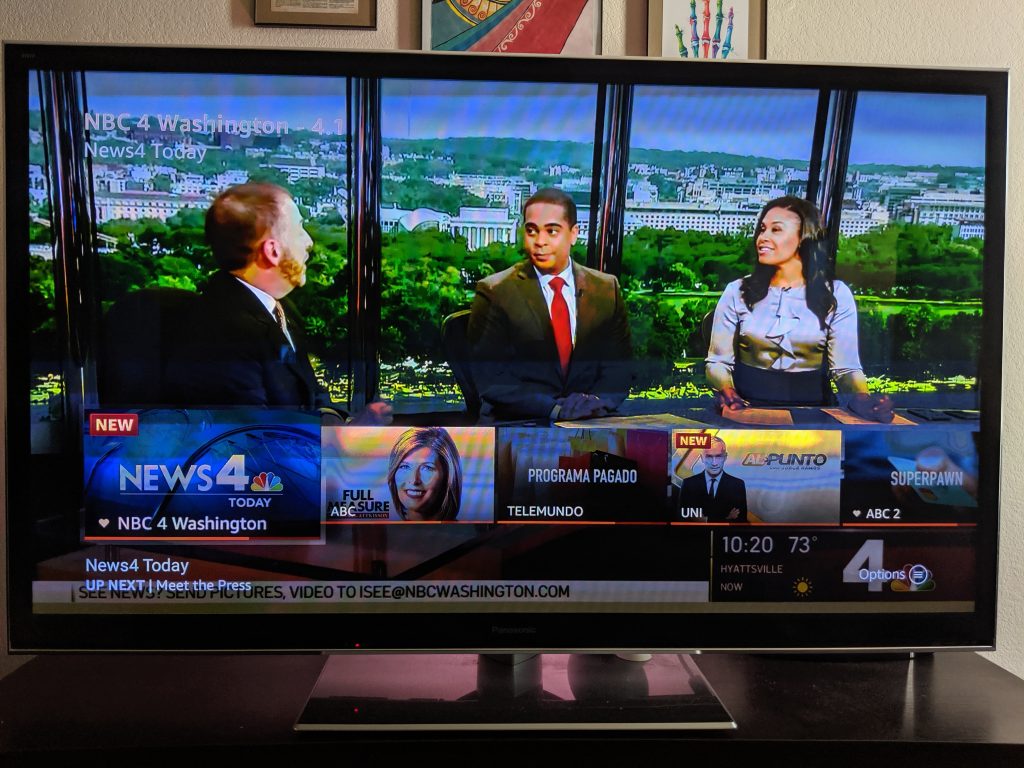
You can search the channel programming while watching TV in two different ways. While you are watching a channel, you can press the down button on a Fire TV remote to view what else is on currently. Use the left and right buttons to browse the channels.
The second way involves pressing the menu button while watching a channel and selecting the channel guide. This will minimize your current channel in the bottom right corner while giving you access to the full channel guide.

4. Expand Available Storage
After launch, Amazon added support for using external hard drives to expand the existing capacity of the Fire TV Recast utilizing the USB port. This is great option for those looking to store more content than can fit on the 500GB and 1TB models.
You’ll need to to purchase one of 3 hard drives Amazon recommends based on their compatibility testing:
As an Amazon Associate I earn from qualifying purchases made from affiliate links in this post.
There are a few important things to note:
- The Recast will format your hard drive before you can store recordings.
- You cannot have other types of files on the hard drive while using it with the Fire TV Recast.
- The video files cannot be accessed by unplugging the hard drive and connecting it to a computer.
- The Recast will automatically divide content up between the on-board hard drive and the external drive. There's no option to choose where a recording is stored.
- You cannot use a flash drive for external storage.
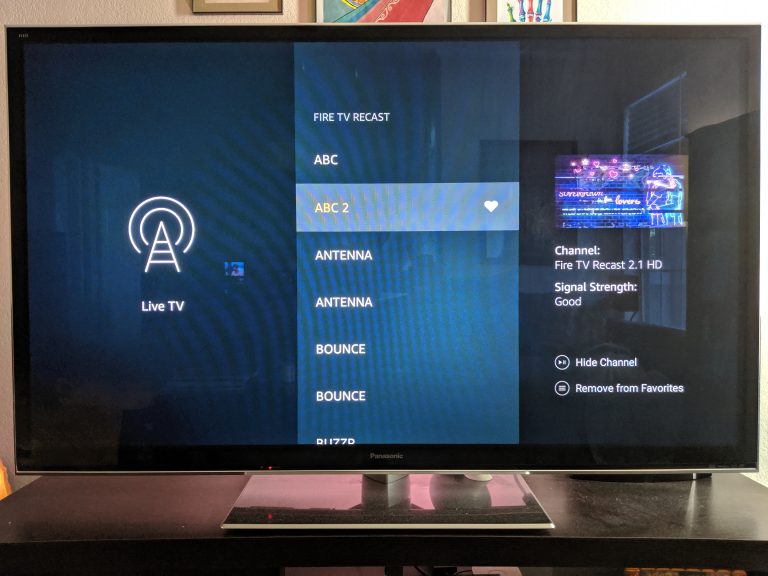
5. Choose Favorite Channels and Hide Channels with Weak Signal and Poor Content
If you read my first post on the Fire TV (here), you may see that I received between 20 and 30 channels initially. The truth is that many of those channels have weak signal or have old content that don’t interest me. Many are even duplicate channels from nearby TV markets.
I am really only interested in the content on less than ten of them. Luckily, Amazon included the ability to hide channels as well as the ability to add favorite channels. You can filter the channel guide to only show you your favorite channels and they will usually appear at the top of the guide.
6. Relocate the Recast to an Area with Better Reception
One benefit/disadvantage of the Recast is that you can locate it anywhere in your home. Sure that means your video quality is subject to your Wifi network’s strength. But the ability to move the Recast enables you to position your antenna in the location with the best reception. Moving the Recast from one room to the next led to me receiving 10 more channels as well as improving the signal on others! And one of the channels happened to be ABC which I was missing before.
7. Connect an USB-powered Amplified Antenna
In case you cannot get strong antenna reception, you can opt to use an amplified antenna. I decided to replace my 5 year old Amazon Basics antenna which had a 35-mile range with a new amplified model from 1byone which has a listed range of 50 miles. Changing my antenna and moving it to a different room led to me getting 10 more channels!
You can cut down on the clutter by plugging in the power for the antenna amplier (if USB-powered) directly into the back of the Recast. Of course, this would mean that you would not have the ability to use an external hard drive. Pick up the same antenna I use below.
As an Amazon Associate I earn from qualifying purchases made from affiliate links in this post.
8. Using Alexa Commands
Being an Amazon product, you could already guess that Alexa is built-in.
The Recast has all the basic commands covered with voice commands. Alexa commands actually do cut down on the number of steps to do certain functions.
Consider the following examples:
“Alexa, Tune to ABC.”
When paired with a Fire TV Cube, Alexa will turn the TV on, switch to the correct input, and automatically tune to ABC. This saves effort and time. You typically would have to turn on your TV, wait for the menu to come on screen, and then navigate to the “Live” tab and select NBC.
“Alexa, Record NFL”
This will search the channel guide for you and find programs with the title of NFL and set them to record.
“Alexa, Show me the Channel Guide”
This will automatically open the channel guide for you to quickly see what’s on.
See the full list of Alexa commands on Amazon’s Fire TV Recast FAQ page.
9. Record Before and After Your Scheduled Program
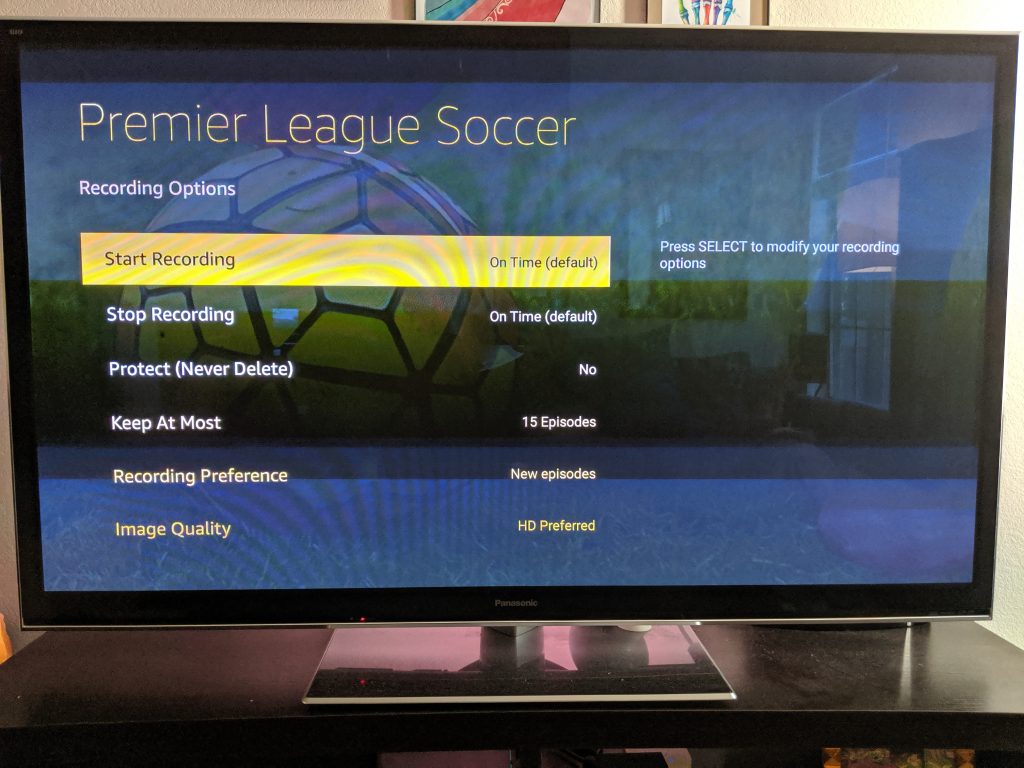
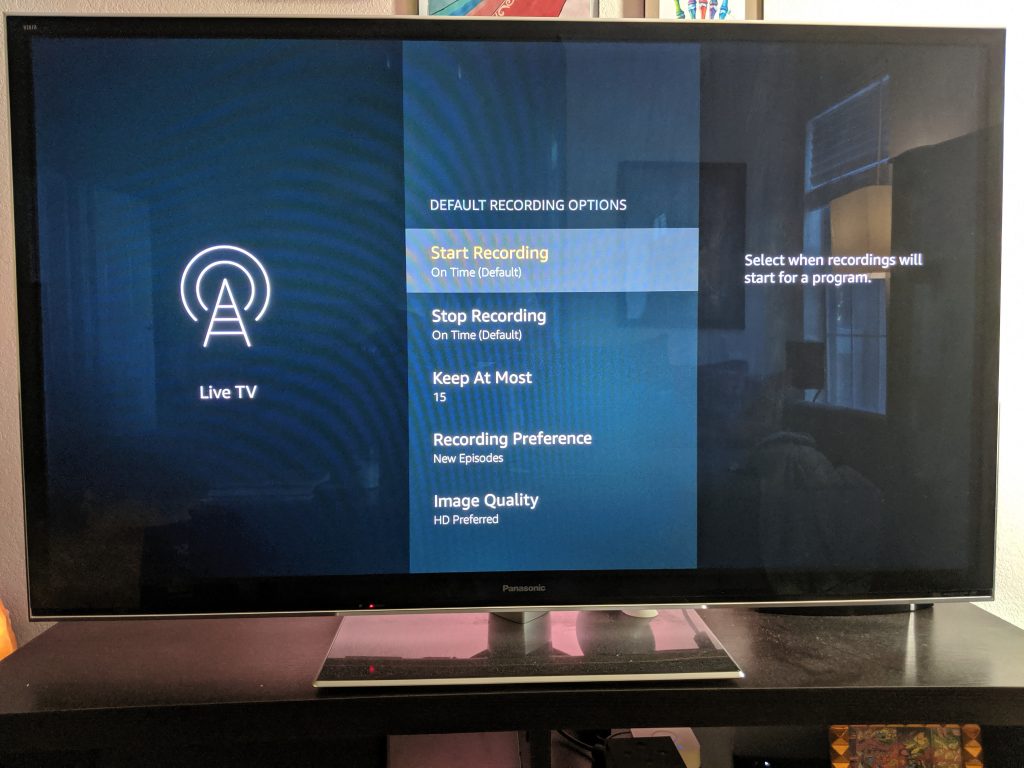
You can set the Recast to record before and after the scheduled time for a program on the channel guide. This comes in handy for sports. In fact, the Recast automatically asks you if you’d like to extend your recording past the scheduled time when recording sports.
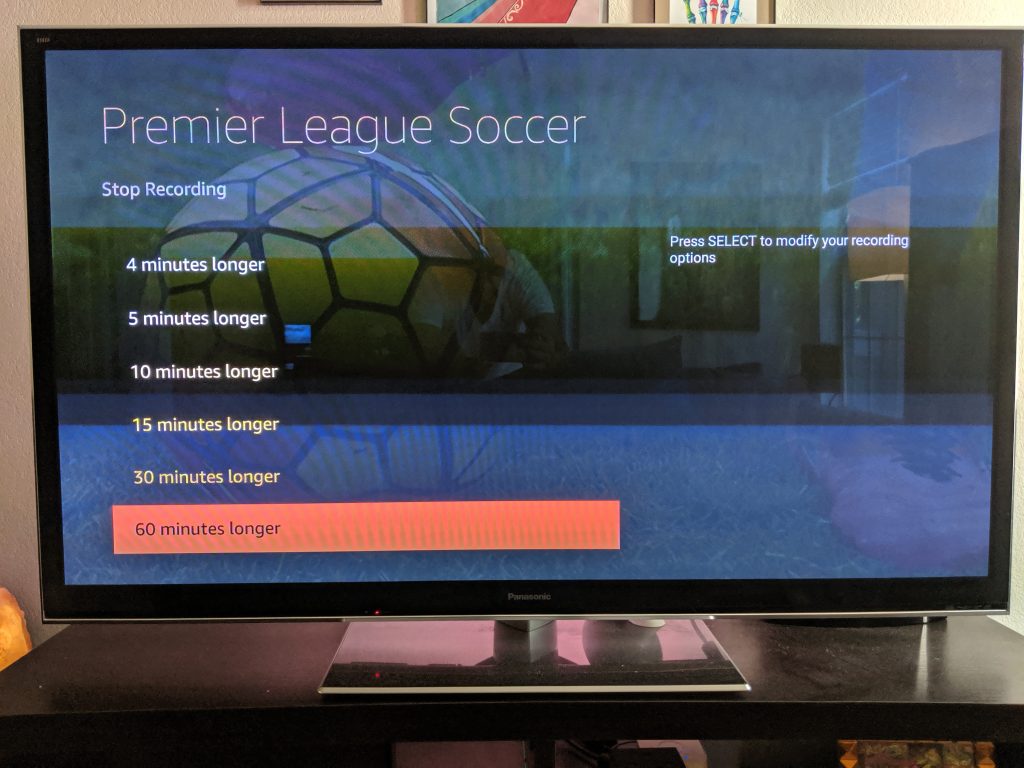
You can choose to extend recording for individual programs or you can choose to extend your recordings by default by going into the default recording options in the DVR tab.
BONUS: Use a Second Antenna in Your Setup to Get
Use a second antenna in your setup to potentially take advantage of more channels or better picture quality using your TV’s built-in antenna. Read my post about these new features added to the Fire TV Cube here.
Recast Tips and Tricks Closing Thoughts
The Recast is a great entry for Amazon into the DVR space. Once you have setup your Fire TV Recast, learn about the great features that improve the user experience. Hopefully, the Recast tips and tricks I’ve covered in this article will help improve your experience with the device. As the Recast and Alexa evolves, I hope to see Amazon add more features with future updates.
Helpful Links
Affiliate Product Links
As an Amazon Associate I earn from qualifying purchases made from affiliate links in this post.