Summer 2020 Budget PC Build Guide
In May earlier this year, I decided to build a new computer as have the many others stuck at home during the Coronavirus pandemic. Here is my experience building my budget PC while trying to get good value for the money.

By Shainur Ahsan
My Second PC Build
My first ever PC build was back in 2011 and was considered a budget PC. The computer had served me well with some light gaming and general productivity. Now that computer was eight and a half years old, I felt it was time to put my extra time in lockdown to good use and build another computer.
My main motivation for building was upgrading to Windows 10 from Windows 7. Since I would be doing a complete reinstall of the operating system, I didn’t want double my efforts if my computer suddenly died. After watching YouTube PC building videos, I learned about the Ryzen 1600AF (12nm) and what an incredible value it was at $85. It spurred me to start planning my computer build around that processor.
And so I started taking notes of the various parts recommended in the videos to pair with the processor and tracking prices from online retailers. I actually ended up going with a different processor due to an incredible deal, but am incredibly satisfied with the looks and performance I was able to get.
So, I wanted to share my experience for anyone else looking to build a PC this summer or fall. I’ll go through my thought process when planning my build and covering the steps of the build. While this guide won’t be a completely all-inclusive guide, I’ll cover all of the major steps. You can find much more complete guides online and YouTube, but it’s always nice to read about amateur buildings and their experience.
In This Post
- Planning Your PC Build
- Shopping for Parts
- Putting the Parts Together
- Installing the Operating System and Software
Planning Your PC Build
Given that this was my second PC build, I had a general idea of what to do to physically build the PC. I also remembered the mistakes I had made from that build. But, I wasn’t closely watching the changes in the PC tech space and wanted to be sure I wasn’t missing anything. Also, I wanted to check which of the latest technologies I could include in my build at my budget. So, I set out to do some research to make sure I got the best bang for my buck.
Research Sources
During my first build, I believe I relied exclusively on websites to walk me through the process. I was dumb at that time to not check YouTube and find the many great videos that had probably covered and showed the steps in detail. I luckily did not make that mistake this time and used YouTube as my primary source while also looking through websites, forums, and even chat. Let’s cover some of the best sources to plan your PC build.
YouTube
YouTube is one of the best sources for information on how to build a new computer. There are many channels out there that exclusively cover PC building within all different budget ranges. Given that videos are uploaded frequently, you can get a sense of which parts are the best value at the time of your build. They often cover alternatives, in case certain parts are low in stock. These videos are helpful in planning, but you must definitely consult some of the additional resources I mention below to help pick your parts.
The videos are best for showing you step-by-step the process of building a PC and point out common mistakes new builders make. Many of the channels have high quality videos where they zoom in to show you some of the more nuanced steps in greater detail.
Some channels that helped me with my build:
- Paul's Hardware
- BitWit
- ROBEYTECH
- Toasty Bros
- Scattervolt
Here are some additional channels which don’t cover budget builds as often, but do provide a lot of info on part selection and general knowledge.
- Linus Tech Tips
- Jayz2Cents
Websites
No matter how many videos you watch, you will definitely need to go to a few websites to plan your build. While the videos will walk through you all of the physical steps of building a PC, they can’t completely cover all topics. Determining parts compatibility and power consumption can vary due to differences in all of the parts. You’ll also want to make sure all of your parts will fit in whatever case you choose.
You’ll definitely want to take advantage of PC building websites which have developed tools such as compatibility filters for parts and power consumption calculators. Many retailer and manufacturer websites now have these features.
You’ll also definitely want to visit the motherboard manufacturer website to confirm your CPU and RAM are compatible with the specific motherboard model you choose. If you don’t see your particular combination of parts listed on the manufacturer’s website, you can always check build forums to see if others have had luck in matching particular parts together.
Here are some good websites to visit to help you with your build:
- pcpartpicker.com
- NewEgg
- Microcenter
- Motherboard Manufacturer Website (ASUS, MSI, etc.)
- Power Supply Manufacturer Websites (CoolerMaster ,Seasonic, etc.))
- Computer Case Manufacturer Websites (CoolerMaster , NZXT, etc.))
Retailers
You might also spend some time becoming familiar with the different stores (online or physical) from which you can buy your parts. Most of the best part sources are online, but you never know what you might find locally in your area. Microcenter is one physical store that has competitive pricing compared to online retailers but is only located in major metro areas.
Remember that some online retailers feature marketplace sellers which are not exactly sold directly from the retailers. You’ll want to make sure the parts you buy are from authorized sellers so that the manufacturers warranty will stay valid.
Here are some popular (and some less common) sources to buy parts from:
- Amazon
- NewEgg
- ebay
- B&H Photo
- Walmart
- Microcenter
Factors to Consider for Planning
Now that you know where to look for information, let’s briefly discuss the main factors in deciding your parts. As these factors are personal, you’ll need to choose how much weight you put on each factor.
- Price
For many, their PC build will be limited to the parts they can afford. Working backwards from a particular budget, you can start to figure out how much to allocate to each part in your budget. At the budget end, you’ll probably want to try to target 25-30% of your budget towards a graphic card if building a gaming PC. The budget is up to you, and if you want a particular part in your PC you can aim for it.
Definitely watch videos on Youtube to find builds at your budget. You can also look at PC’s build budgets by others on sites like PCPartPicker. Also, use their PC builder tool for your own build to keep track of your budget and look for the best price.
- Performance
The next major factor is PC performance. Getting decent performance with most major games can be achieved by even most gaming PC’s when running at 1080p. However, when you start running games on higher resolution screens you’ll definitely need higher system requirements. One good way to plan is to list current-gen and next-gen games that you want to play. Then, make sure the system you’re building meets the minimum requirements.
You’ll also want to check the likelihood of new generation hardware coming out in the future. You can either put the latest tech in your build, or score a deal on the out-going gen parts which will still offer decent performance. There are many YouTube channels that constantly cover hardware news and can help you make a decision.
- Aesthetics
The last major factor is aesthetics or how cool the PC will look. This is definitely not too important in running games. But, if your PC will be proudly on display in your room, you’ll want it to stand out. Aesthetics will usually come at a premium if you’re looking for parts with RGB lighting. However, some components such as computer cases or RAM can be found with added lighting for just a small increase in cost.
Matching parts with color schemes other than black or gray could increase your cost a bit, as components in other colors are sold in limited quantities. You can watch videos on YouTube to get an idea of the different ideas for all different budgets.
Shopping for Parts
Taking the above factors into account, I wanted to center my design around price and set a budget of around $600. I watched multiple YouTube videos to understand the performance I would get from various graphics cards. I decided on including a Nvidia GTX 1660 Super graphics card in my build. This would be more than enough to run games at 1080p resolution with high settings. Because I don’t often play the latest or demanding games, this would also last me for years to come.
I wanted my build to also look good, so I would allow myself to spend a little extra if it meant improving the aesthetics. So, now I will go into the order in which I decided on the parts of my PC. I planned on saving money by reusing a hard disk drive and the power supply from my current computer. I intend to upgrade both during sales on Black Friday.
Picking the CPU and Motherboard
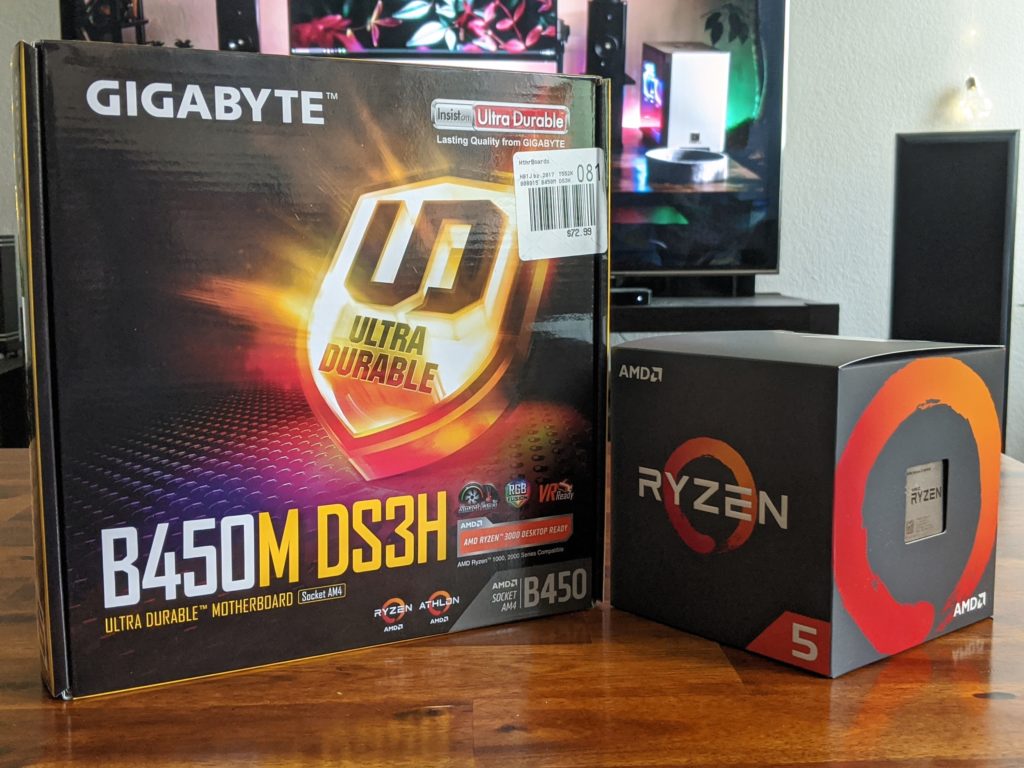
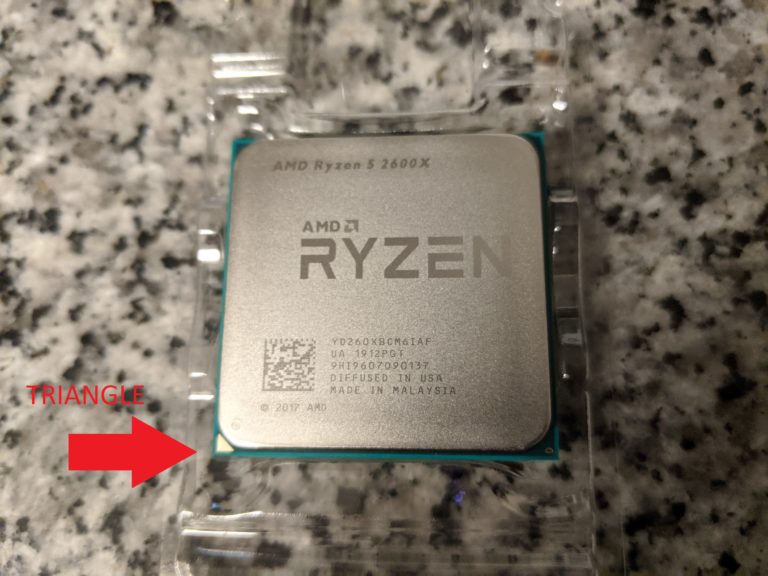
Based on the videos I watch, many PC builders were recommending using the Ryzen 5 1600AF CPU which sold for $85 for my budget. However, when I checked Microcenter, I determined the better deal would be to get a Ryzen 5 2600X. The processor sold for $99, but there is a $20 discount when buying a motherboard in the same order. I actually got better performance for a few dollars less! Spending some time in Discord chatting with other builders helped confirm this.
I knew at the time that a newer generation of processors had already been released (3000 series), but the 2600X was too much of a great value to get anything else for my budget.
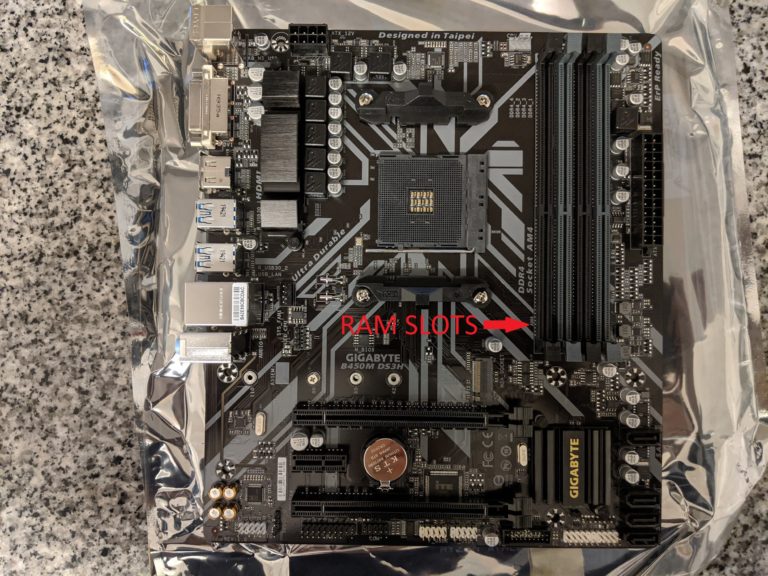
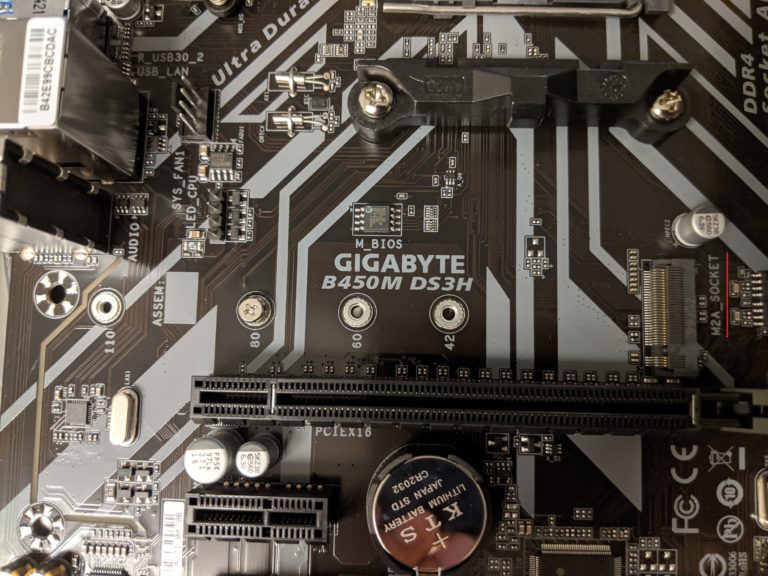
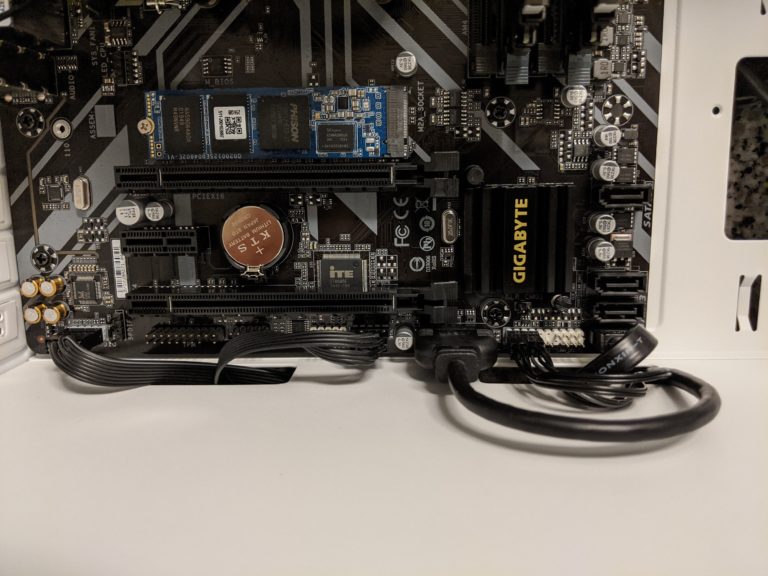
For the motherboard, I was deciding between lower end B450 motherboards sold by ASRock and Gigabyte. I again consulted Discord and was recommended to buy the Gigabyte D3SH. This motherboard was also sold by Microcenter which would allow me to take advantage of the bundle deal. As I did not intend to do any overclocking, this motherboard was more than sufficient.
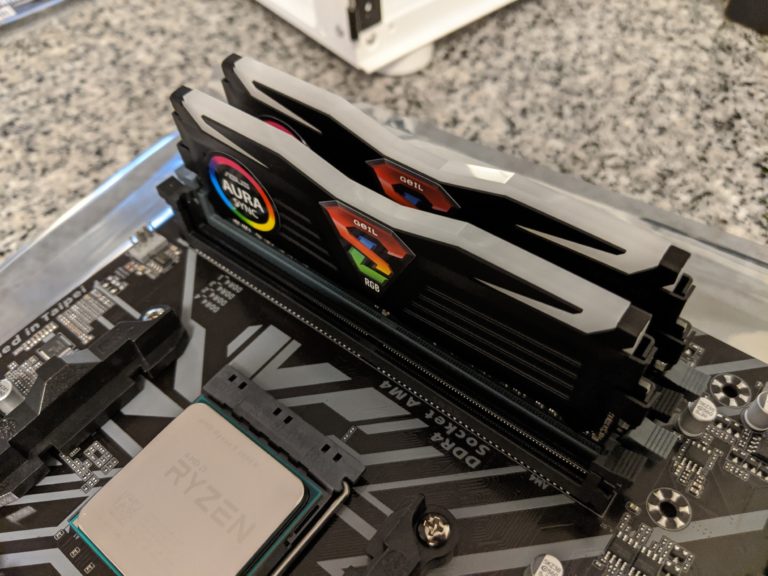
Selecting a RAM Kit
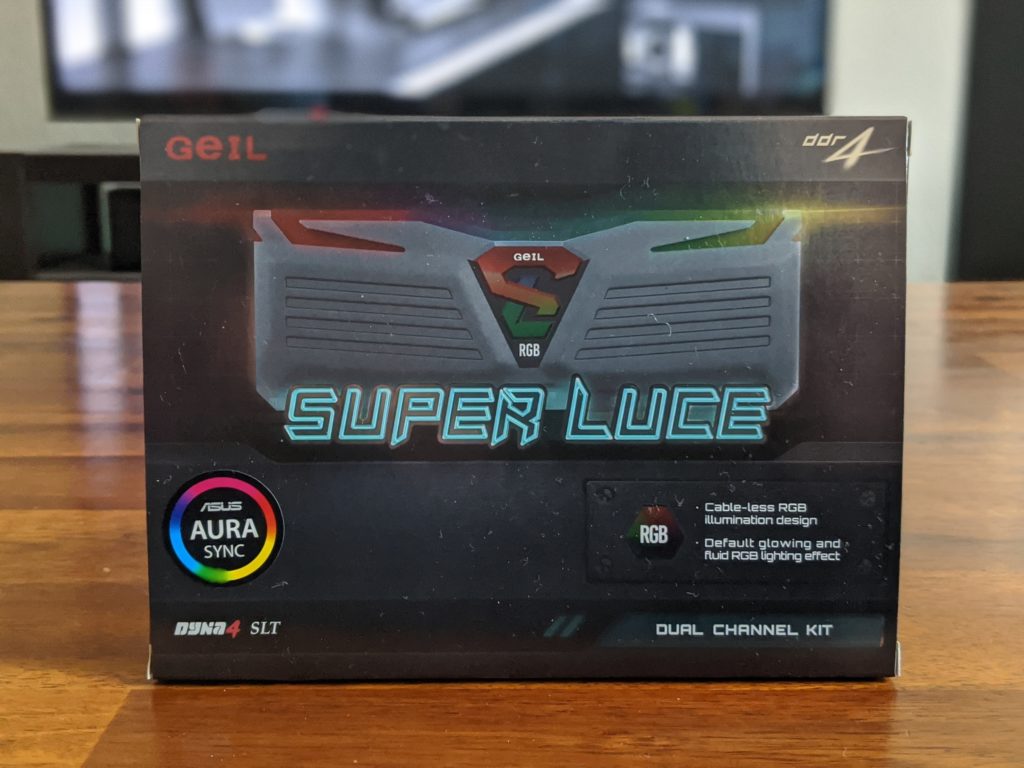
Based on the specifications of my motherboard, I wanted to get a RAM kit with the fastest supported clock speed of 3200 Mhz. At first, I was just looking at the cheapest kits and saw that the TeamForce Vulcan Z kits were often recommended. When checking Newegg, I found a RGB kit sold by GEIL which would be just a few dollars more. I decided to go ahead and spend the extra to get some lighting in the case.
First, I was unsure about the compatibility with my motherboard because it wasn’t on the official list of supported RAM. I confirmed the RAM was compatible by searching the reviews for my particular motherboard model. A few reviewers mentioned not having any issues, so I know I was good to go.
Choosing an SSD
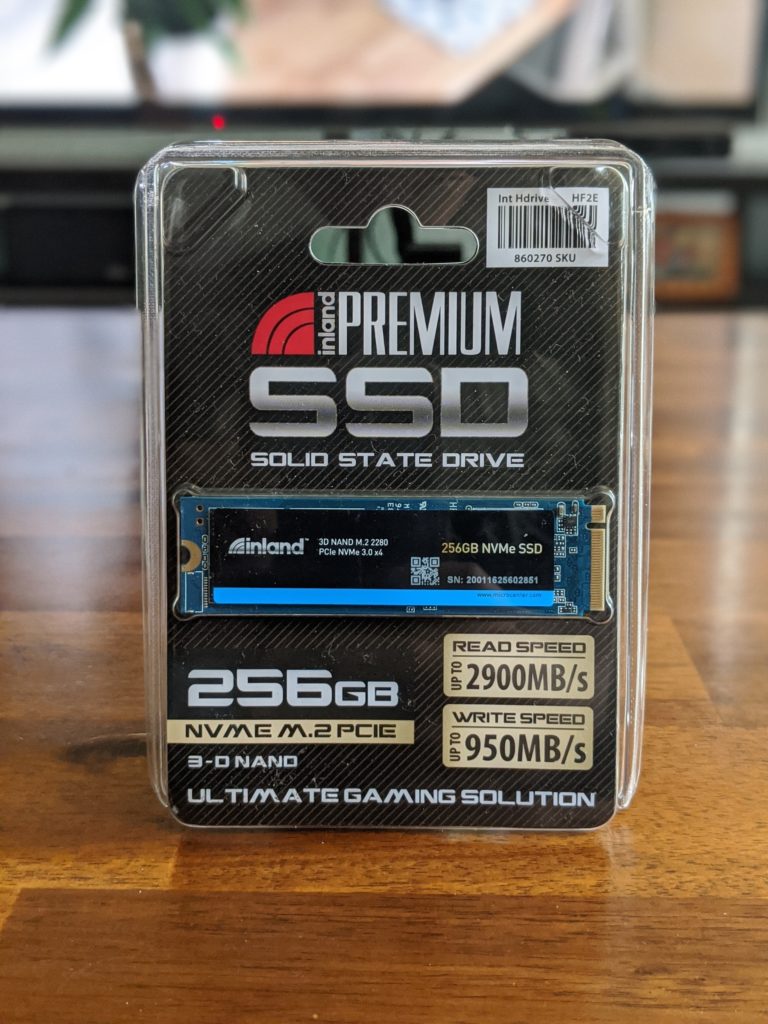
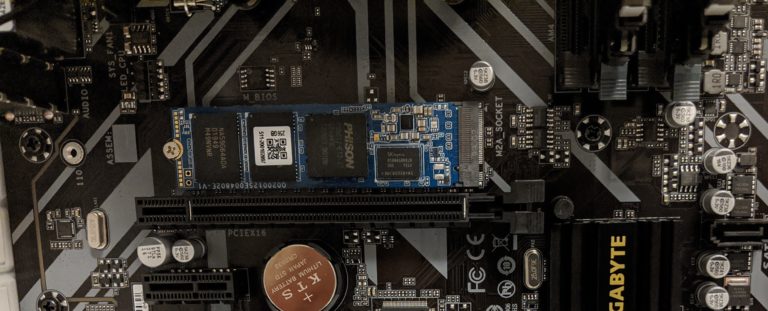
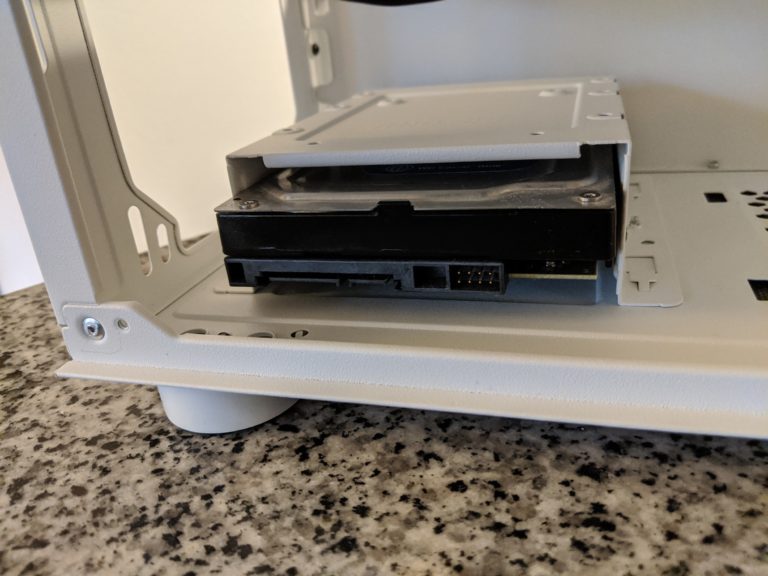
For storage, I planned to reuse a 500 GB mechanical drive which I am currently using. However, I did want to upgrade my boot drive because it kept running out of space in my old PC. Doing some research, I found out that I could buy one of the newer format NVME M.2 solid state drives (SSD) to put in my PC. My budget motherboard also supported this. I decided to go with a 256 GB to ensure I had enough space for my operating system and a few programs. The NVME drive has much faster read and write speeds than traditional SSD’s. I was able to find a decent drive at Microcenter.
I intend to install my games and keep my other files on the 500 GB drive. In the future, I plan to upgrade this drive to either to a larger SSD Sata drive or mechanical drive. This would be far more convenient since newer games have very large install sizes.
Choosing a Graphics Card
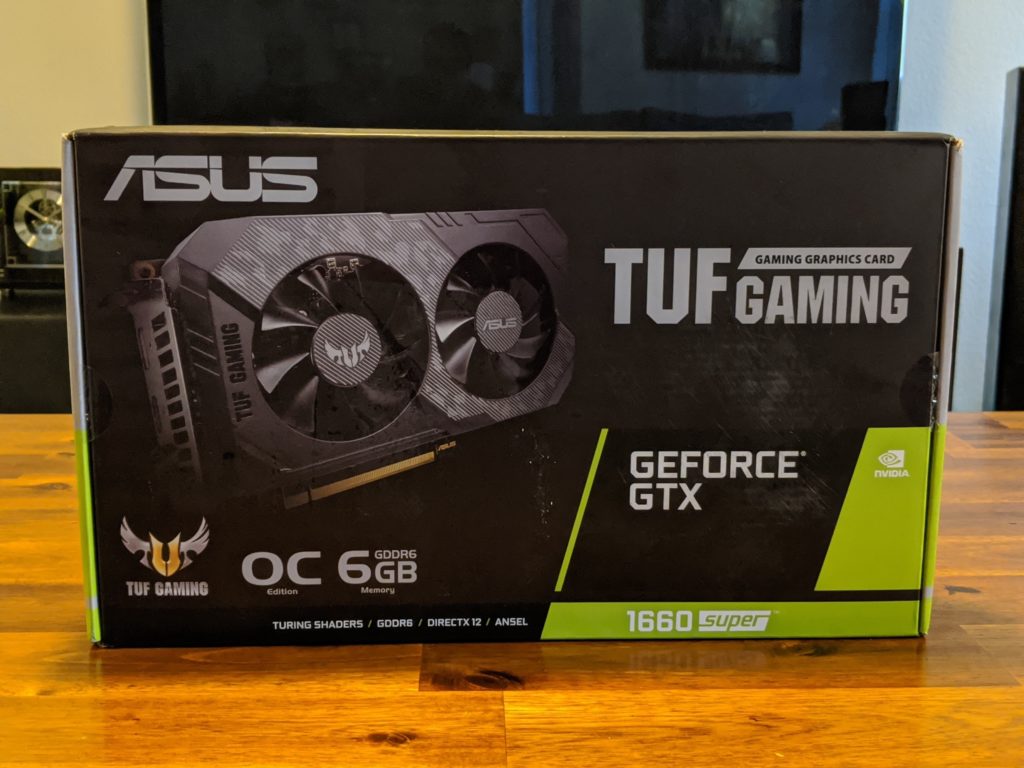
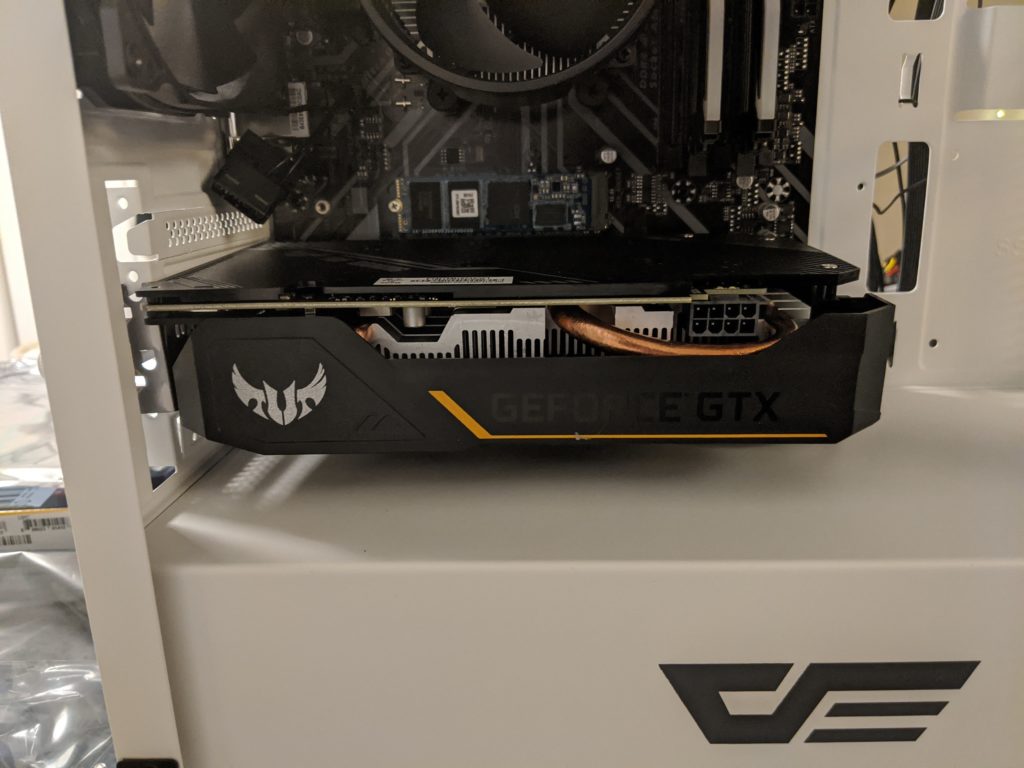
Although I knew which model of graphics card I wanted (GTX 1660 Super), I had to pick which manufacturer to buy it from. Ultimately, I just decided to go with the lowest cost card with a dual fan cooler since I also didn’t plan to do any overclocking. I settled on the ASUS TUF Gaming card which had decent reviews.
I purchased the card from Amazon because it seemed like it would come back in stock there first. I still had to wait for about two weeks for the card to ship due to limited availability due to Covid-19.
Selecting a PC Case
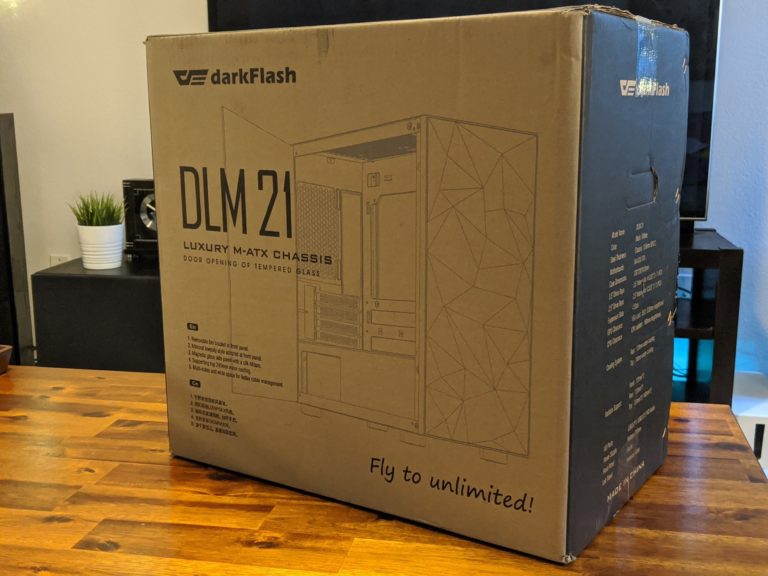
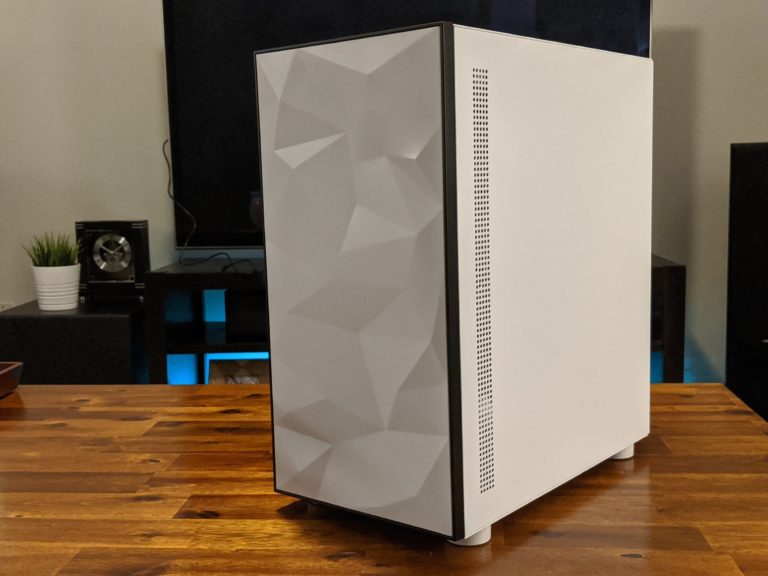
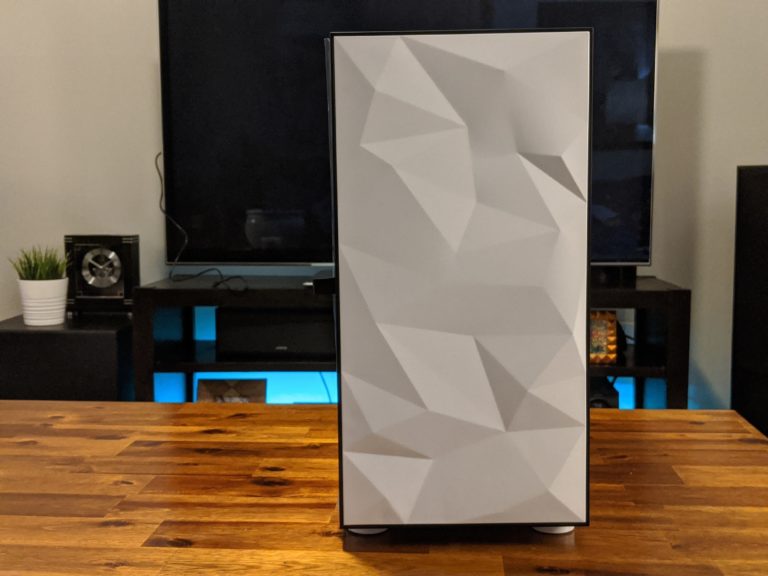
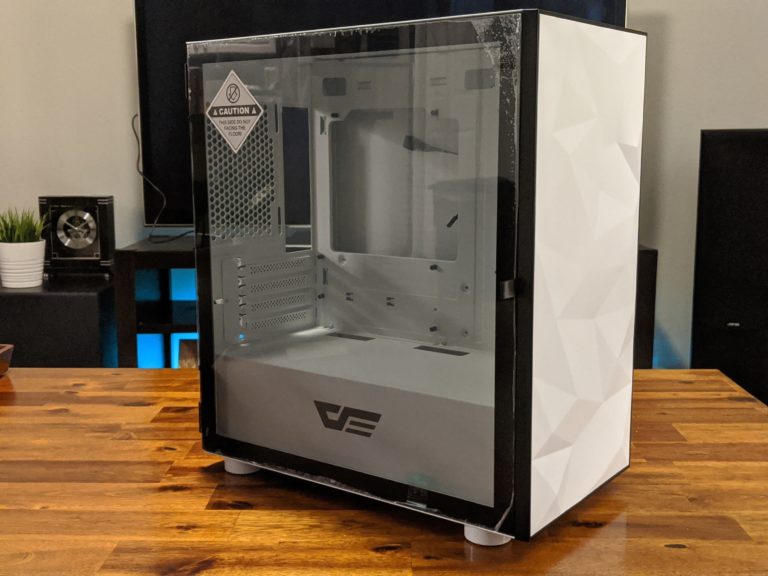
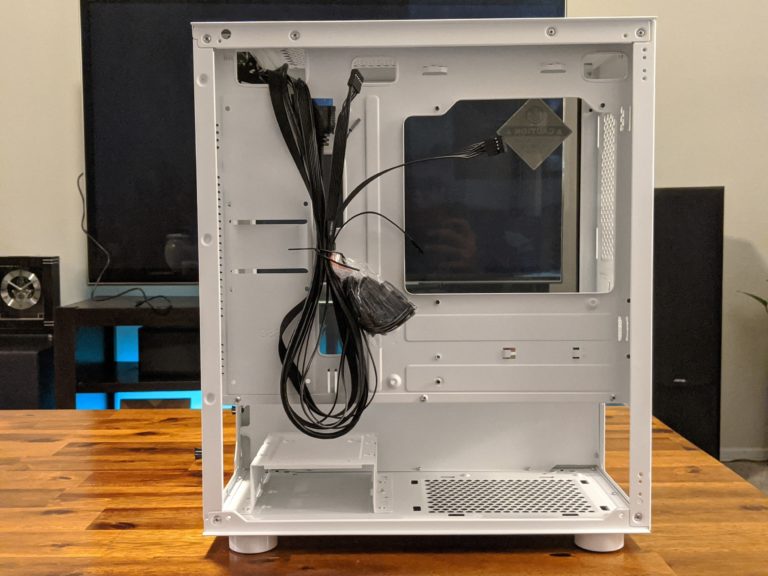
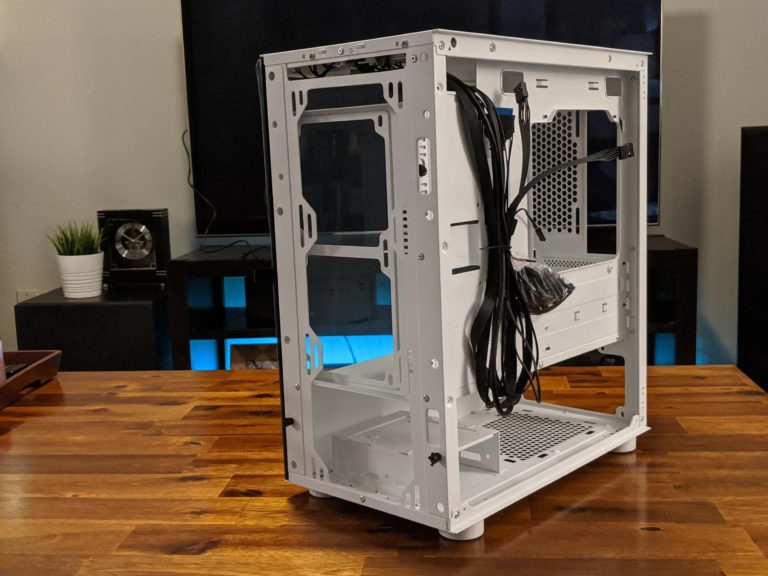
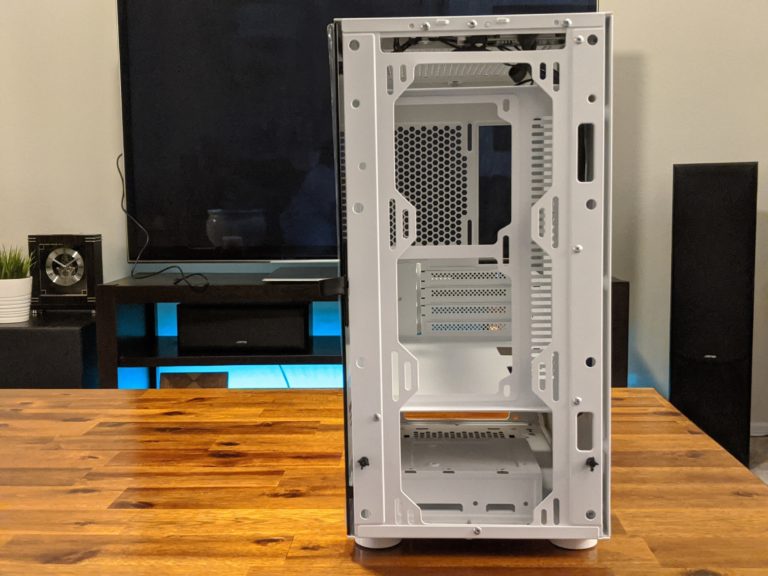
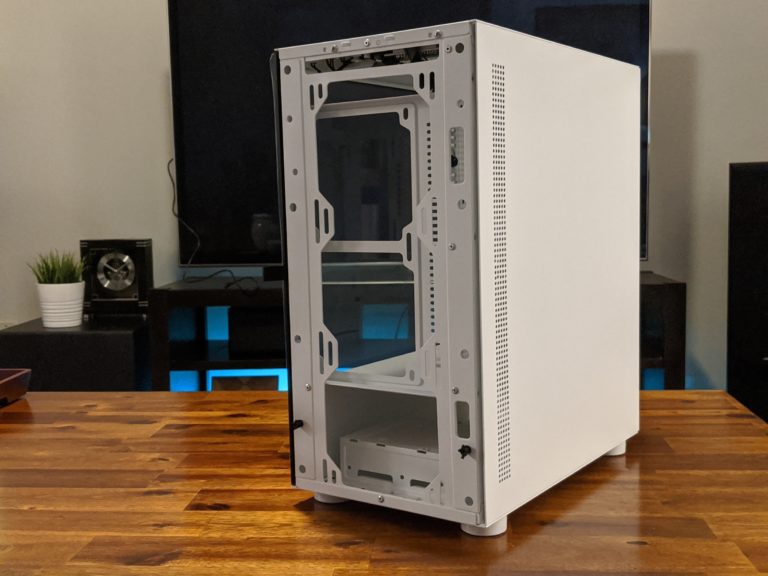
Of all the components, I probably spent the most time on researching a case. I wanted to try to stick to a $50 budget, but ultimately decided to spend extra for aesthetics. I found the DLM21 offered by DarkFlash to be the most attractive choice in a semi-compact form.
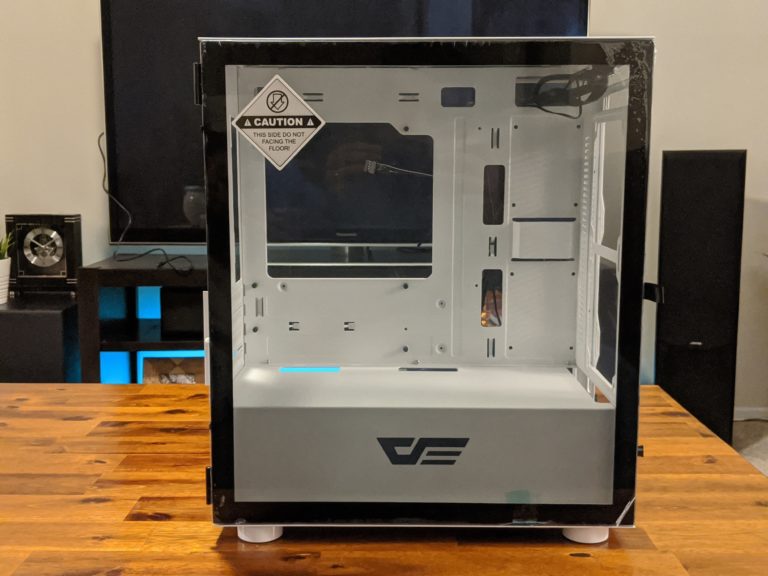
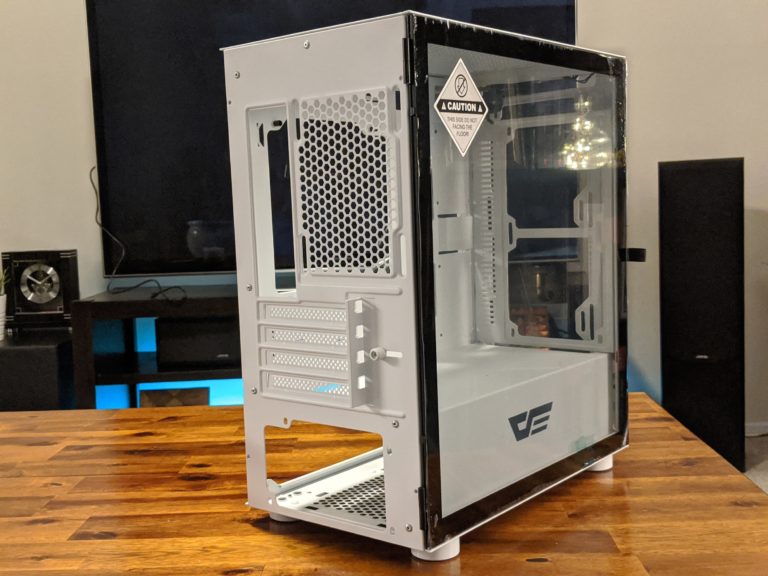
The case has a cool geometric pattern on the front panel which makes it stand out. The case also had some nice features such as a glass side panel and a basement for the power supply and hard drive. I found the case to be cheapest on Darkflash’s store through Walmart.com of all places.
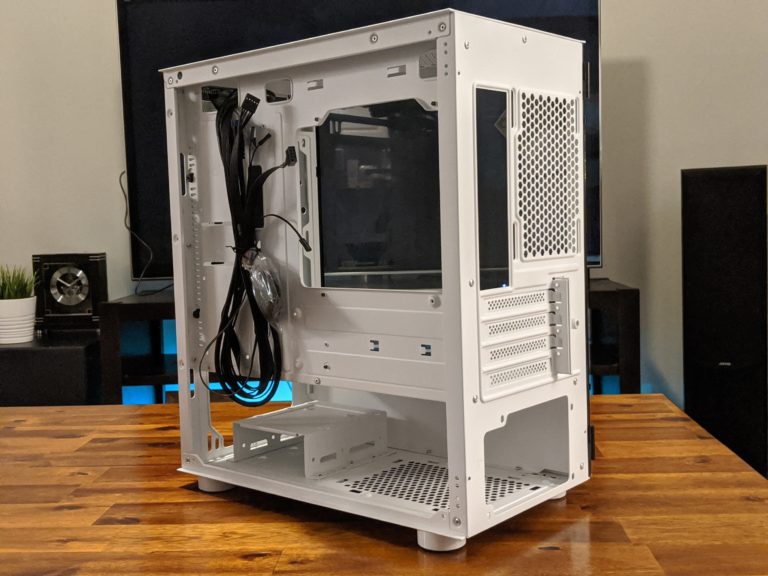
The only concerns I had for the case were how good the airflow would be and the fact that it didn’t come with any fans. I decided that this would be OK since I didn’t plan to do any overclocking and I could easily just open the side glass panel in case heat started to build up. Also, after looking on Amazon, I found a cheap set of fans to complement my build. For those concerned with airflow, there is a similar model with a mesh front.
Picking Out Fans to Add to the Case
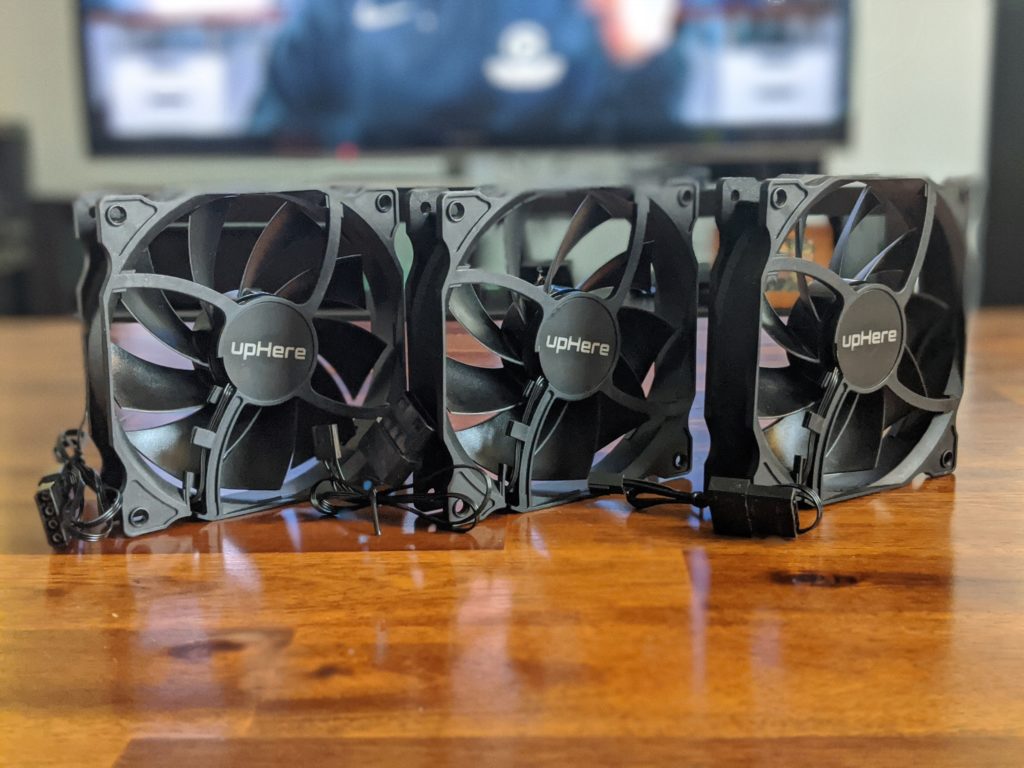
Because my case didn’t come with any, I just looked for fans on Amazon. I went with the 3 pack of uphere fans which were relatively cheap. The fan speeds are no controllable and are powered by older molex connectors. I put two fans in the front and one in the rear.
Since my motherboard can support one PWM fan (adjustable speed), I do want to upgrade the rear fan in the near future. As new parts have continued to be released, I included some alternate parts and potential upgrades in the affiliate links at the end of this post.
My Total Cost
- CPU - Ryzen 5 2600X ($99)
- Motherboard - Gigabyte DS3H B450 ($52.99 with bundle discount)
- RAM - Geil Super Luce 2 x 8GB - 3200 Mhz ($72.99)
- SSD - Inland Premium 256GB NVME M.2 Drive ($44.99)
- GPU - ASUS TUF Gaming GTX 1660 Super ($229.99)
- Case - darkFlash DLM 21 ($54.99)
- Fans - upHere 3-Pack ($11.99)
- Total $602 (with Tax)
Putting the Parts Together
Putting the PC together can be highly satisfying once you have the steps down. While I won’t, cover everything in depth, I’ll touch on all the major parts of a PC build. You can find many complete build guides on websites and YouTube channels. This PC is relatively basic, but you may have extra steps depending on your part choice.
Let’s get started.
Preparing Your Build Area
Because you will be working with multiple parts, you’ll want a large table or surface to work on. Ideally, you want to work in an area without carpet as you’re going to be working with exposed circuit boards and chips and don’t want to mess them up with static electricity. You can get static bracelets to keep you grounded.
Next, you’ll want to make sure you have basic tools. These usually include scissors and a screwdriver. The screws themselves should come with your parts.
Working with the Motherboard, CPU, and RAM
First, you’ll want to have your motherboard, CPU, and RAM set out and in your work area. You can take the CPU and cooler out of the box, but be sure to keep the individual packaging on the CPU and cooler until your ready to work with them (read on to know why). You can set your motherboard on top of its box to work off of. It’s better to keep the motherboard like this rather than installed in the case at first. If you have an NVME M.2 SSD, you can also keep it handy to put into the motherboard during this step. Be sure to review the documentation that came with the motherboard to understand where the various parts and cables connect.
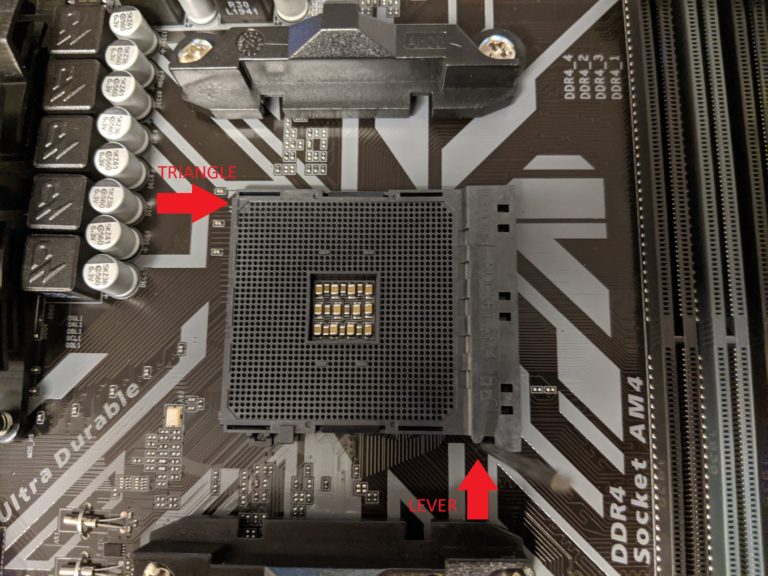
The first step in the build process will be to insert the CPU into the socket on the motherboard. Remove any protective covering on the motherboard socket if present. The socket should have a lever which should be moved to the released position.
Next, take the CPU carefully out of its packaging ensuring not to touch or bend any of the pins on the underside. On the top side of the CPU, look for a golden triangle near one of the corners. You should also see a triangle (may not be gold) near one of the corners of the socket on the motherboard. You’ll need to set the CPU into the socket with the two triangles aligned. Push with slight pressure (but not too hard) to make sure the CPU is in the socket. Then, take the lever and move it to the locked position. This is the step that makes most new PC builders nervous, so take your time and review build videos to under stand what to do.
These next steps can be done after installing the CPU cooler/heatsink, but can be convenient to do first since the cooler won’t be in the way. The RAM slots should be located on the side of the CPU socket. Consult your motherboard’s documentation to determine which slots are the DIMM 1 and 2 slots (versus 3 and 4). Many motherboards have the two pairs color coded. Note that these slots will NOT be next to each other. The slots will usually be laid out in this pattern (1-3-2-4), so be sure to install the RAM in the correct slots. The RAM will only fit into the slot in one direction. Press in the sticks of RAM into the slots until the lever on the side clicks into place.
If using an NVME M.2 SSD for storage, you can install it now. The slot(s) should be located below the CPU socket. Rather than sticking straight out of the board, the slot is perpendicular to the board. Like the RAM kit, the M.2 drive only fits into the slot one way. The motherboard should have come with a screw to hold the M.2 drive in place. Mine was screwed into the motherboard. Stick the M.2 into the slot at and angle and press it against the motherboard. Screw in the M.2 drive.
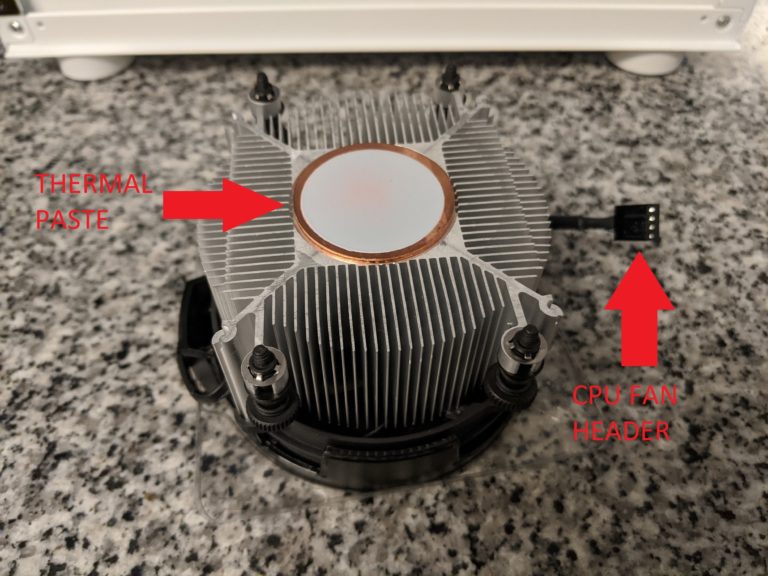
This next step assumes that you will be using the stock CPU cooler/heatsink that comes in the box. You’ll need to consult the manufacturer’s instructions if using an aftermarket cooler. Carefully, remove the packaging around the cooler and do not touch the paste on the underside (on the copper plate). This paste needs to be intact to ensure you have a good thermal contact between the CPU and the underside of the cooler.
There are four screws (usually pre-placed) around the cooler which should line up with holes with threads in the motherboard. Starting at one of the screws, start screwing it in. When it is about three-quarters screwed in, proceed to the next screw on the opposite corner of the CPU until screwed in the same amount. Repeat with the remaining two screws. Then go back to the first screw, and continue to screw in until there is firm resistance. Repeat with the other screws going in the same pattern as before. Plug in the cable for the CPU cooler into the header marked CPU Fan.
Now that the main components for the motherboard are installed, you can proceed to getting the case ready to install the motherboard.
Prepping the Case and Installing the Motherboard
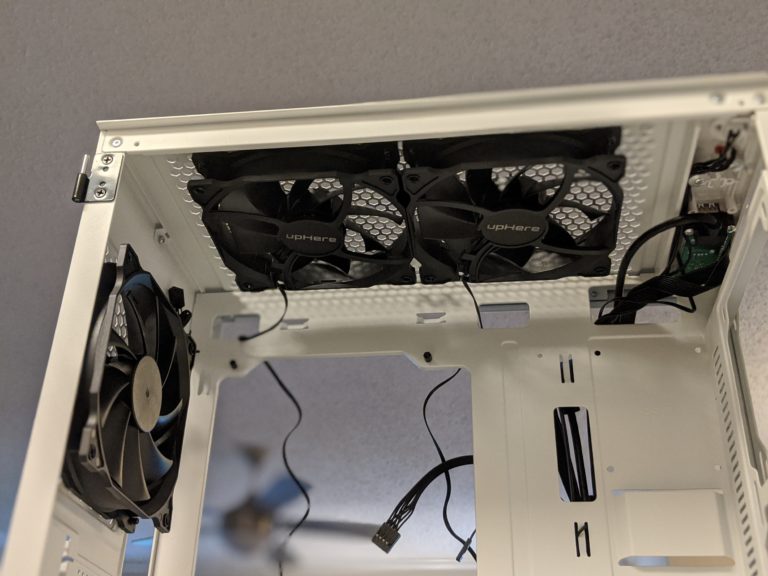
Depending on your case, you may not have much work to do. In my build, I had the added step of installing three case fans. I arranged two fans on the top to intake air and the one rear fan to exhaust air. When there is more intake than exhaust, it is known as creating positive pressure in the case. I decided after the build, to move the two intake fans to the front. However, many cases come with case fans, and for budget cases the provided fans are typically sufficient.
At this stage, you can install the motherboard. First install the I/O shield into the rear of the case. This plate is provided in the box with the motherboard and snaps into place. Install the motherboard by screwing it in to the provided standoffs. The standoffs can be preinstalled but regardless, they should be provided with the case.
Next, take the bundle of preinstalled cables in your case and route them to the appropriate headers on your motherboard. These headers are for USB, HD audio, power and reset button, power and hard drive lights, and maybe a case fan. The headers on the motherboard are usually located along the bottom and right side of the board.
Finishing the Build with Secondary Drives, the Graphics Card, and Power Supply
If using a secondary hard drive for storage (or non NVME M.2 drive), install the drive in this step. In many cases, there is a cage to support the hard drive whether using a standard disk drive or a SATA SSD. I’m reusing my hard drive from my last build and the cage is located at the bottom of the case. Connect a SATA cable from the hard drive to the motherboard.
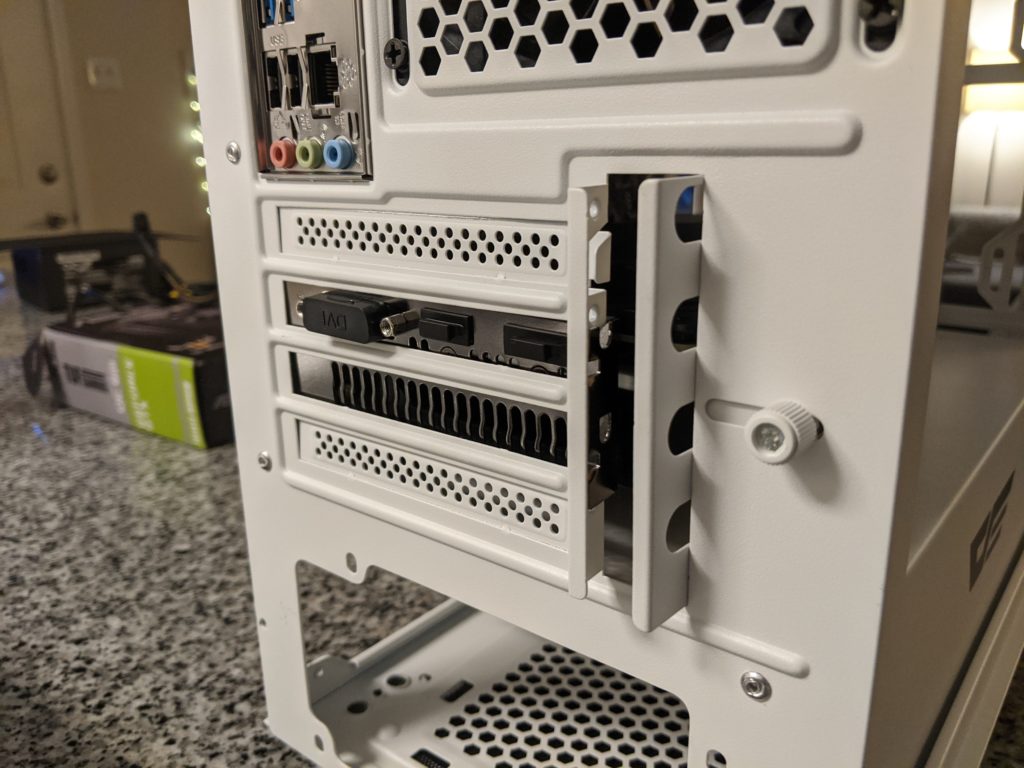
The graphics card is ready to be installed. You’ll first want to make sure the correct knockouts on the rear of the case are removed so that the ports on the rear of the graphics card are exposed. Insert the graphics card into your motherboard’s PCI x16 slot. Note that you want the card to be installed in the x16 to take advantage of the higher data transfer speeds. Press the card firmly into place. Install the screws on the side of the graphics card to secure it to the case.
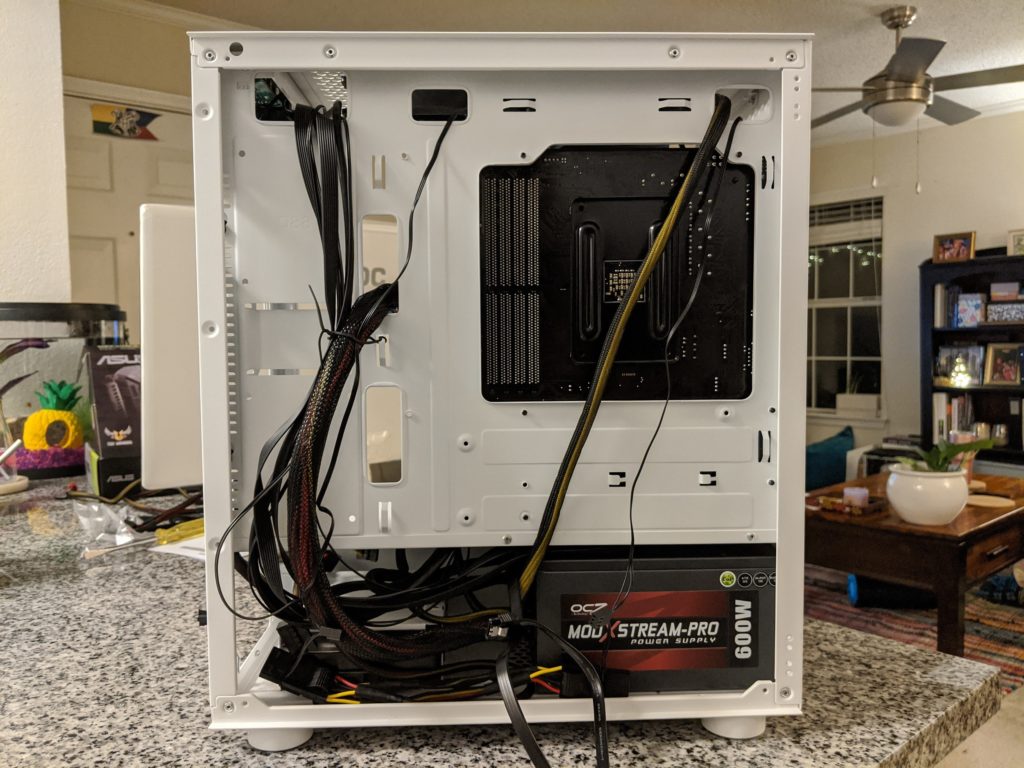
Once the graphics card has been installed, power can be routed to all of the components. You’ll first want to install the power supply into the case before plugging in the connectors to the separate parts. Route power cables on the back side of the case so that they are as hidden as possible. Most cases have cutouts at the key connector locations on the motherboard and for the graphics cards. You’ll also want to connect any hard drives and fans that need to be manually powered.
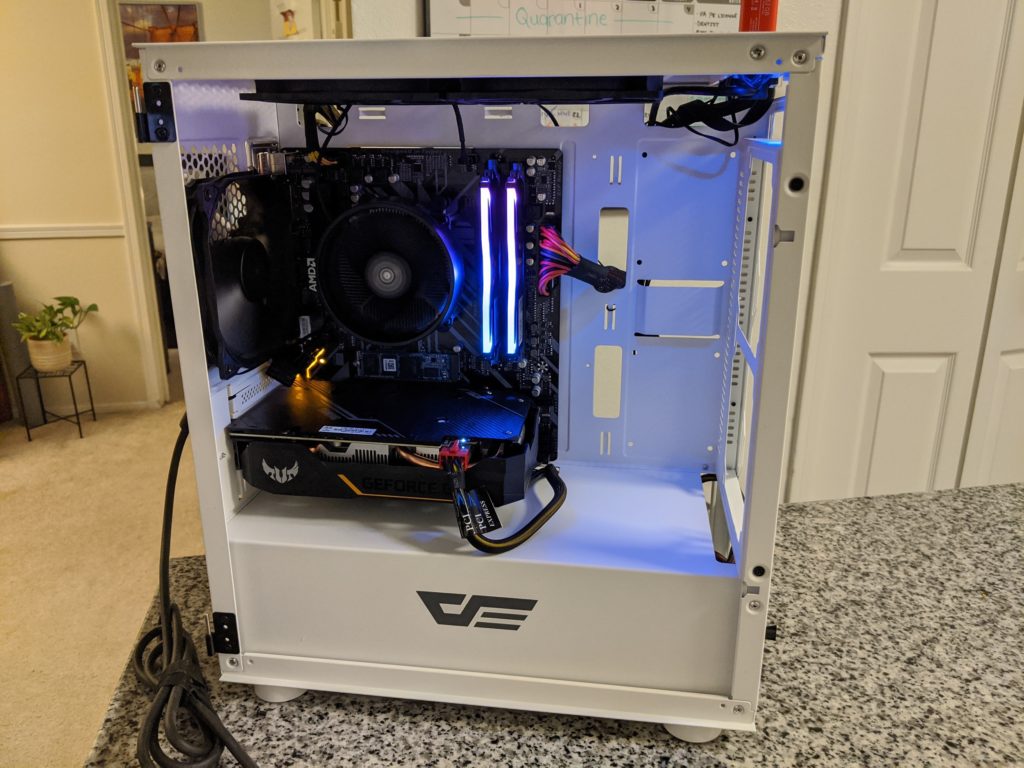
One Final Check Before the Final Touches
At this point, all the cables should be connected and the computer build should be nearly complete. But, before closing the case up, you should do one final test.
Plug in the power into a wall outlet and if you have a monitor nearby plug it in as well. If all the connections are complete, you should see your computer power up. Signs include fans starting to spin and the power and other lights turning on. You should also see the motherboard BIOS come up on the monitor but you won’t see much else as the operating system has not been installed.
If you don’t have any indications that the PC has powered up, check all of the cable and part connections. Make sure the RAM and GPU are securely inserted in their respective slots. If you still don’t see the PC powering on, confirm parts compatibility. If that still doesn’t work, then there is a chance one of your parts is defective. You would have to have a second PC to test out the parts or you may have to go to a computer repair shop to have the parts tested.
If your PC has sucessfully turned on, you can go ahead and organize the cables in the case and put in any final screws and covers. At this step you’re ready to install the operating system. The usual way to install the OS is to load the Windows installer onto a USB drive. When the computer turns on, enter into the Motherboard’s BIOS and choose the option to boot from the USB drive first. Follow the directions to install Windows.
Setting Up Your New PC
Now that the PC build is complete, it’s now up to you to choose which programs to load onto your computer. Some strong suggestions of things to download are the drivers for your motherboard and GPU. An antivirus program is also important to load. You can find many online guides that can point you to useful tools and utilities that will help you monitor and control how your new PC runs.
Your new PC is now ready to load games onto it. If you have an SSD, you can install your more frequently played games on there to take advantage of faster loading times. With everything installed, you are now ready to enjoy gaming on your PC.
Conclusion
I hope this post has provided some good background on how to plan a budget PC build and to give you an idea of the steps involved in building a PC. This PC build was completed early in summer 2020 so there will definitely be new technology that has since released that you may want to include in your build. I’ve gone ahead and included some of these newer parts in the affiliate links below.
Regardless of all the updates, there’s rarely a point in time when parts will not be updated. So don’t hesitate too much if you want to build a PC. Just research what’s coming out soon and prioritize the features that are actually important to you. Don’t be shy either. There are many great online communities and resources that can help you plan a PC build for all budgets.
2020 is looking to be a great year to get into gaming. Make sure you’re ready with a PC that will let you run the latest games. Good luck in your planning and building and enjoy gaming on your PC.
Helpful Links
Affiliate Product Links
As an Associate I earn from qualifying purchases made from affiliate links in this post.
Planned Upgrade and Alternate Parts
As an Associate I earn from qualifying purchases made from affiliate links in this post.